Crawl space radon mitigation cost: $1,100–$3,000
A sub-membrane system runs $1,100–$3,000 installed. What the membrane, sealing, access and digging add, and what the quote leaves out.
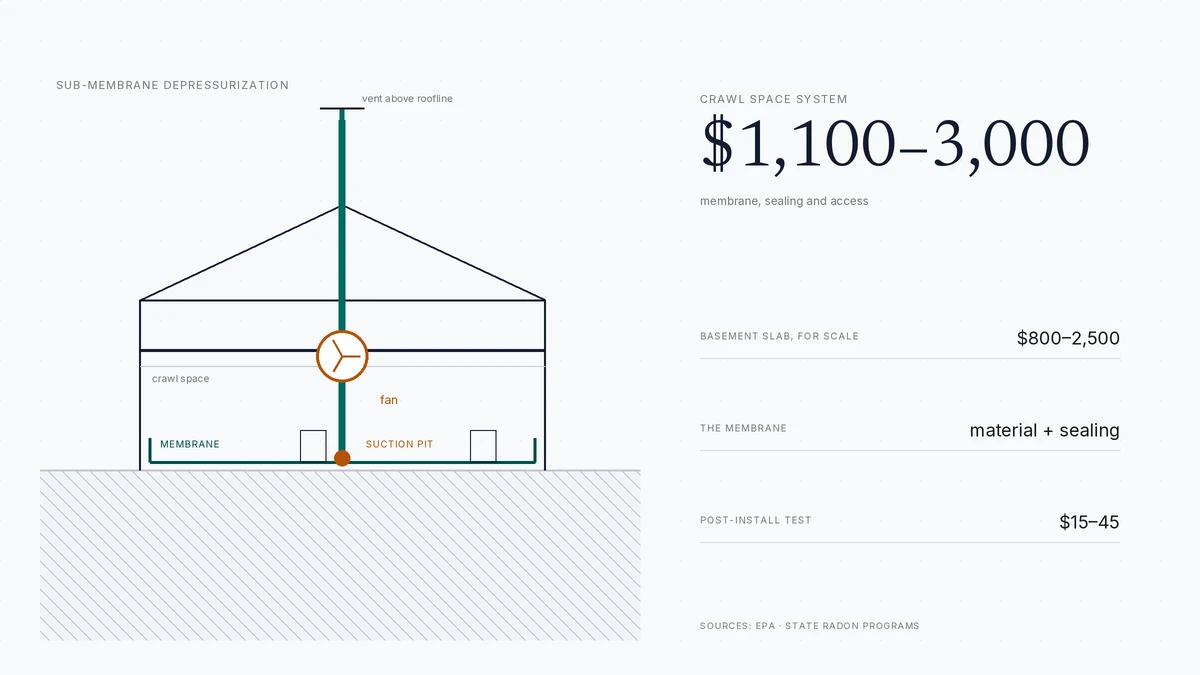
Sub-membrane depressurization for a crawl space runs $1,100–$3,000 installed, against $800–$2,500 for a basement slab. The extra money buys a sealed membrane over the dirt, sealed seams and pier wraps, and often digging. Encapsulation and dehumidifiers are separate.
- Sub-membrane install
- $1,100–$3,000
- Basement slab, for scale
- $800–$2,500
- Fan electricity
- about $127 a year
- Retest after install
- after 24 hours
Some links on this page are affiliate links.If you buy through them we may earn a commission at no extra cost to you. We do not accept payment for rankings. Read the full disclosure.
| Crawl space, sub-membrane | Basement, sub-slab | |
|---|---|---|
| Installed band | $1,100–$3,000 | $800–$2,500 |
| The barrier | Reinforced membrane over dirt, sealed at every edge | The slab itself, sealed at one core |
| Sealing work | Seams, piers, hatches, pipe and duct penetrations | One core, one collar, sump lid if present |
| Access | Crawl hatch, low clearance, debris, standing water | Standing height, concrete floor |
| Hidden extras | Digging, debris removal, damaged duct insulation | Second suction point, slab repair |
Crawl space radon mitigation is sub-membrane depressurization: a reinforced plastic membrane is sealed over the dirt floor, a suction point is cut beneath it, and a fan pulls soil gas from under the plastic and vents it above the roof. The installed band is $1,100–$3,000, compared with $800–$2,500 for a basement slab.
What the work costs
The band is wider at the top than the basement band because the crawl space adds a whole surface to seal. The pipe and the fan are the same hardware either way; the difference is the membrane, the sealing and the conditions.
| Line | Typical range |
|---|---|
| Sub-membrane system, installed | $1,100–$3,000 |
| Sub-slab system, for comparison | $800–$2,500 |
| Post-install test, kit | $15–$45 |
| Post-install test, certified | $150–$250 |
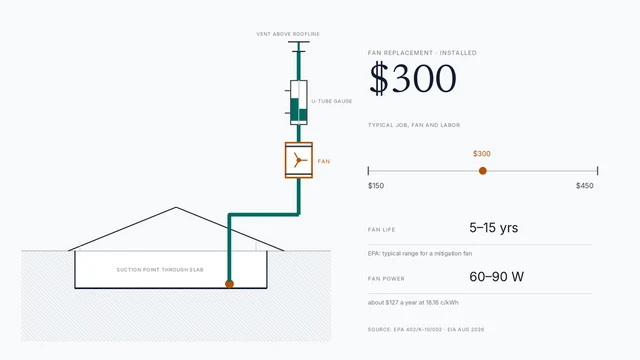
| Fan electricity | about $127 a year |
Most of the spread inside the band comes from three things: the size and shape of the crawl space, how much sealing the framing demands, and whether the floor has to be cleared before anything can be laid. A clean, empty crawl space of ordinary size, with a straight run to the roof, sits near the bottom. A low, wet, pier-dense space with a finished floor above sits at the top.
Why the membrane carries the price
A basement slab is its own air barrier. Concrete is porous enough to pass soil gas, but it is continuous, and one core with a sealed collar turns the whole slab into a suction field. The work is a hole and a seal.
A crawl space has no such surface. The dirt floor passes gas everywhere, the foundation walls are permeable, and the space is interrupted by piers, ductwork, plumbing and a hatch. Suction applied at one point would simply pull room air down through the nearest gap, so the system has to create the barrier first. That is the membrane, and the membrane is only as good as its edges.
This is why the crawl-space band is labor-heavy rather than material-heavy. A roll of reinforced membrane is not the expense. The expense is a person on their knees in a low space, lapping seams, wrapping piers and sealing around every pipe that crosses the floor.
What the membrane has to do
Three properties matter, and a quote should address all three.
It has to hold pressure. A membrane with a low permeance rating resists gas passing through the sheet itself, so the fan’s suction reaches the soil instead of the room.
It has to survive the space. A reinforced, cross-laminated product resists tearing when someone kneels on it to service a duct or a shutoff valve. Builder-grade sheeting does not.
It has to be sealed, not just laid. The ANSI/AARST soil gas standard sets a minimum membrane and requires seams and penetrations to be closed with a compatible sealant. Duct tape is not a sealant; it dries, lifts and fails within a season.
Ask for the product name and the standard it meets. A quote that says “plastic sheeting” has told you nothing you can check, and the difference between a specified membrane and a cheap one is invisible once the space is closed up.
Piers, seams and penetrations
The sealing list for a typical crawl space is longer than homeowners expect, and it is where bids separate.
- Seams. Membrane comes in fixed widths. Every lap has to be overlapped and sealed along its full length.
- Perimeter. The membrane turns up the foundation wall and is fastened and sealed, usually with a mechanical termination strip rather than adhesive alone.
- Piers. Each pier gets wrapped or collared so gas cannot move up the masonry into the living space.
- The hatch. The access opening needs a gasketed, closeable cover, or the suction field leaks straight out of it.
- Plumbing and duct penetrations. Every pipe, every duct boot, every wire that crosses the floor gets a collar and sealant.
- The suction pit. A small excavation under the membrane, often lined, where the riser draws from.
A bid that prices “seal crawl space” without a list is pricing an idea. Ask which of the six items above are inside the number.
Access, digging and the working conditions
Two crawl spaces of identical floor area can be a day apart. Clearance decides posture; the hatch decides how material gets in; water and debris decide how much prep happens before the first seam.
Digging is the line most often added mid-job. The membrane needs to sit on a graded surface, and many crawl spaces have a trench, a mound of builder debris, or a previous barrier buried in mud. Leveling that floor is real labor, and it is not always visible at the estimate stage. Ask explicitly whether digging, leveling and debris removal are included.
Ductwork adds a second problem. Insulated flex duct lying on the dirt is often wet and torn; sealing the membrane around it traps moisture against the duct. A contractor may recommend re-hanging the duct before the membrane goes down, which is correct and is not free. The systems guide covers how the riser and fan are sized for these layouts.
Why it costs more than a basement slab
Set the two jobs side by side and the gap is visible. A basement install is a core, a collar, a pipe and a fan, done standing up. A crawl-space install is a membrane over an irregular floor, dozens of seals, pier wraps, a hatch cover and a suction pit, done on knees in the dark.
The basement job also fails visibly. If the slab seal is bad, the manometer reads low and the post-install test catches it. A crawl-space leak is often a single unsealed pier cavity behind a duct, which shows up only as a radon number that will not come down. Finding it later costs a return visit.
What the quote usually leaves out
Sub-membrane depressurization is not encapsulation, and the two are routinely bundled. Encapsulation covers the walls, insulates, and often includes a dehumidifier; it is a moisture and energy project that can cost more than the radon system itself.
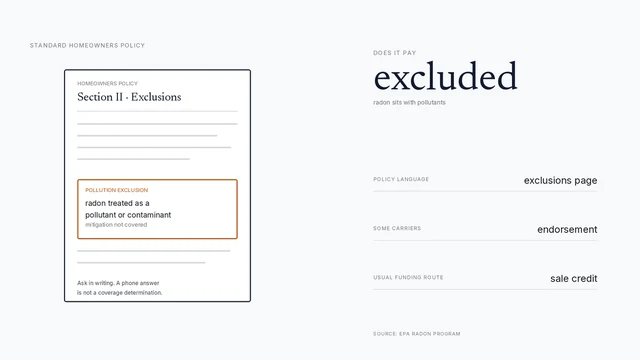
Other common exclusions: structural repair to joists or piers, mold remediation, replacement of damaged duct insulation, a new electrical circuit for the fan, drywall repair where the pipe runs inside, and the post-install test. None of these is unusual. The problem is only when one appears as a surprise invoice after the membrane is down.
If the crawl space has an active moisture problem, fix the water first. A membrane laid over standing water traps it, and a fan pulling moist soil gas through a cold pipe can create condensation in the run.
Proving it worked
The install is not the finish line. Run the fan for at least 24 hours, then test the lowest livable level with a short-term kit ($15–$45) or a certified measurement ($150–$250). Below 2 pCi/L is the usual target; at or above 4 pCi/L, the system has a leak or an undersized field and the contractor should diagnose it before anyone talks about a second system.
Then keep the paperwork: the membrane product, the fan model, the suction-point locations, the permit if one was pulled, and the post-install result. Retest every two years, and after any renovation or HVAC change that alters how the house breathes. The cost breakdown shows where the crawl-space band sits against every other system type, and the foundation guide explains why the same house can need two different designs.
How to do it
- Test the lowest livable levelPlace the test in the lowest level of the house that people use, which for a crawl space house is usually the floor above it. A kit costs $15–$45 with lab analysis.
- Get the membrane specifiedAsk for the product name, the reinforcement type and the standard it meets. A quote that says only plastic sheeting has not specified anything you can check.
- Confirm the sealing scopeSeams, perimeter, piers, hatch, plumbing, duct boots and the suction pit all need closing. Ask which of those sit inside the price and which are extra.
- Ask what happens to the floorDigging, leveling and debris removal are the most common additions. Get them priced before work starts so the membrane is not laid over rubble and gravel.
- Run the fan, then testAfter at least 24 hours of operation, run a short-term test. Below 2 pCi/L is the usual target. A crawl space that still reads high usually has an unsealed path.
Frequently asked questions
Why does crawl space radon mitigation cost more than a basement?
A basement job pulls from under a continuous concrete slab, so one core and one seal is most of the work. A crawl space has a dirt floor that leaks everywhere at once, so the contractor has to lay a membrane, seal every seam and penetration, wrap the piers, and often dig to get the material flat. That labor is the difference.
Does a crawl space need a full encapsulation for radon?
No. Radon mitigation needs a sealed membrane over the soil and a suction point beneath it. Encapsulation is a broader moisture and insulation job that covers walls and often adds a dehumidifier. Some contractors sell both together, and the radon system can be installed on its own first.
What thickness of membrane does a radon system need?
Ask the contractor to name the product and the standard it meets. The ANSI/AARST soil gas standard sets a minimum for the membrane and requires seams and penetrations to be sealed, not taped with duct tape. A reinforced membrane resists tearing when someone kneels on it during later service work.
Can the existing crawl space vapor barrier be reused?
Rarely. A thin builder-grade barrier is usually torn, poorly lapped, and not sealed at the walls or piers, so it cannot hold a pressure field. A contractor may reuse it as a base layer. Expect a new reinforced membrane as a line item rather than an assumption.
How long does a crawl space installation take?
One day for a clean, accessible crawl space of ordinary size. Add a day when the space is low, wet, full of debris, or divided by piers and ductwork, because the sealing cannot start until the floor is clear. The schedule is set by access, not by the pipe.
Does the price include a post-install radon test?
Often not. A short-term test after at least 24 hours of operation is the proof the system works, and a kit with lab analysis costs $15–$45. Ask for it in the contract. Without it you have paid for a membrane and a fan with no evidence the number came down.
Sources
Some links are affiliate links.If you buy through them we may earn a commission at no extra cost to you. We do not accept payment for rankings. Read the full disclosure.